
Growing up by the beach in Southern California, the ability to knot a macrame bracelet was practically a right of passage. Although those days are long behind us, we’ve never forgotten the ever-so-simple square knot technique. This time, however, we’re replacing hemp and wooden beads for more updated elements like colorful nylon cord and glossy metal charms. Happy knotting!
You’ll need:
- 4 yards of 0.5mm chinese knotting cord
- a connector or charm
- an embroidery needle
- a pair of scissors
- flat nose pliers (optional)
- a lighter (optional)

Start by cutting the knotting cord into two 30 inch, two 20 inch and one
10 inch lengths. Fold the 20 inch piece in half, pull the loop through
the ring, fold it over the ring, and pull the rest of the cord through
the loop. Repeat the step on the other side of the ring. These strands
will be anchored and remain stationary.

Center the 30 inch cord under the two middle strands. Fold the right
cord over the middle strands and under the left cord. Pull the left cord
under the right and middle strands and through the loop on the right
side.

Pull tightly and slide the knot up to the top.

Finish the 2nd half of the square knot by folding the left cord over the
middle strands and under the right cord. Pull the right cord under the
left and middle strands and through the loop on the left side.

Pull tightly and repeat the steps – left, right, left, right . . .
Continue knotting until the desired length is reached. Keep in mind that
the clasp will take up approximately half an inch.

To finish the knots, thread one of the cords onto a needle and sew up the center of 3-4 knots along the backside. Pliers will help pull the needle through the tight knots.

Repeat the same step on the other cord.


To make a sliding closure, shape the bracelet into a circle and overlap the middle strands. Use scraps to temporarily tie the cords together at each end.

Take the 10 inch cord and center it under the strands. Start tying square knots exactly the same way the bracelet was executed.

Stop at about half an inch and sew the knotting cords into the backside of the closure. Remove the temporary ties.

The two sets of middle strands are now the adjustable ties of the bracelet. Adjust to fit the wrist and tie each end into knots. Trim away any excess.

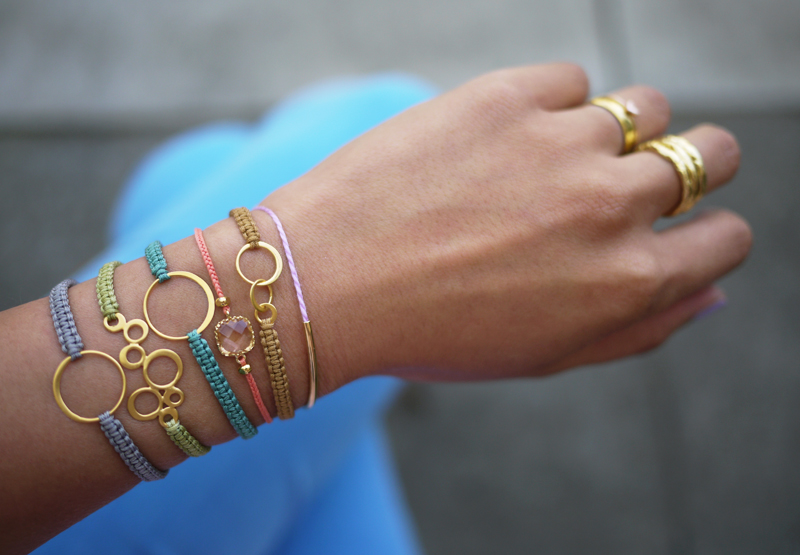
Your adjustable knotted bracelets are finished!! xx

Credits: http://honestlywtf.com
If you want to take a great deal from this paragraph then you have to apply such methods to your won blog. outlook 365 sign in
ReplyDelete